Page 1 of 7 1 2 3 4 5 6 7 LastLast
Results 1 to 10 of 63

Thread: Sams scooter of death

  1. #1
    Moderator Sam-Q's Avatar
    Join Date
    Dec 2008
    Name
    Sam
    State
    VIC
    Location
    Endeavour Hills
    Country
    Australia
    Posts
    4,242

    Default Sams Suicide Scooter

    Well seeing I may effectively have my own section to put my worklog in I thought why not.


    I know this isnt relevent to this forum and I am not running any toyota parts but I thought people might be interested to see some custom work done on something unconventional.

    I wanted a scooter that was affordable, had a clutch, air filled tyres and was relatively fast and cheap to mod and service. This ruled out any go-ped or zenoa engine. So I decided to make one that was made from the parts of a pocket bike, cheap easy and with disk brakes.

    Anyway here goes:


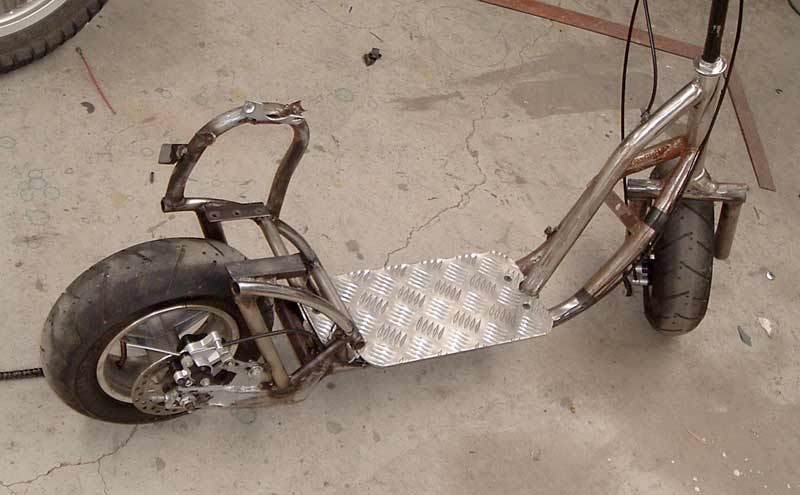
    - Heres what I started with after I stripped the frame and choped a bottom plate off


    - After I chopped off the rear fork and welded on a pocket bike fork that I prepared earlier


    - I braced the frame


    - I welded up the rear forks properly, chopped some bike forks down for the front, bolted them to a wheel and sat it next to where I thought it would end up sitting


    - My new custom fork tack welded together


    my new forks welded to the original forks that had been chopped


    how it made the frame sit with the lower height, notice how it slopes downwards


    the front part of the frame chopped getting measured to see how much to take off


    aligning the newly cut down forks and checking for straightness
    Last edited by Sam-Q; 20th December 2008 at 06:30 PM.
    My website: SQ Engineering - 4AGE and 3SGE upgrade/replacement parts

    - SQ Engineering on facebook -

    Please e-mail to contact me instead of sending a private message on here.

  2. #2
    Moderator Sam-Q's Avatar
    Join Date
    Dec 2008
    Name
    Sam
    State
    VIC
    Location
    Endeavour Hills
    Country
    Australia
    Posts
    4,242

    Default


    - Dummy fitting the engine roughly where it will be sitting bar it being a few cm higher and more towards the front of the bike


    - Front part of the frame welded on and smoothed over


    New headset to frame pipe welded in and smoothed over.


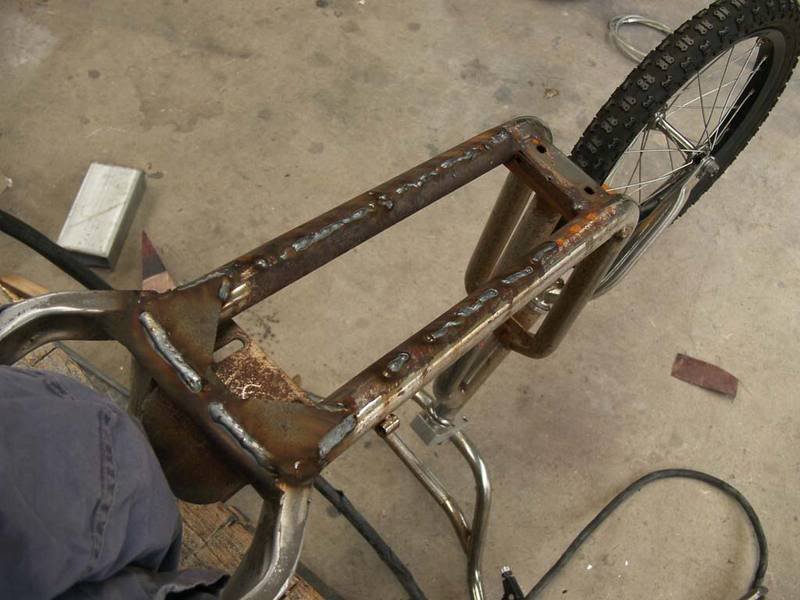
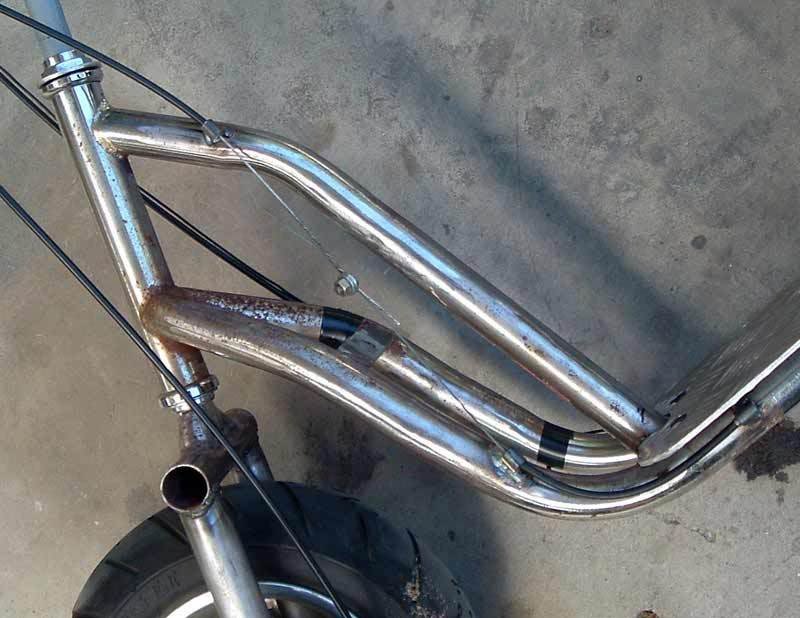
    Vertical pipes shortened, horizontal pipe welded in, two strengthening gussets welded in.


    Making some new engine mounts


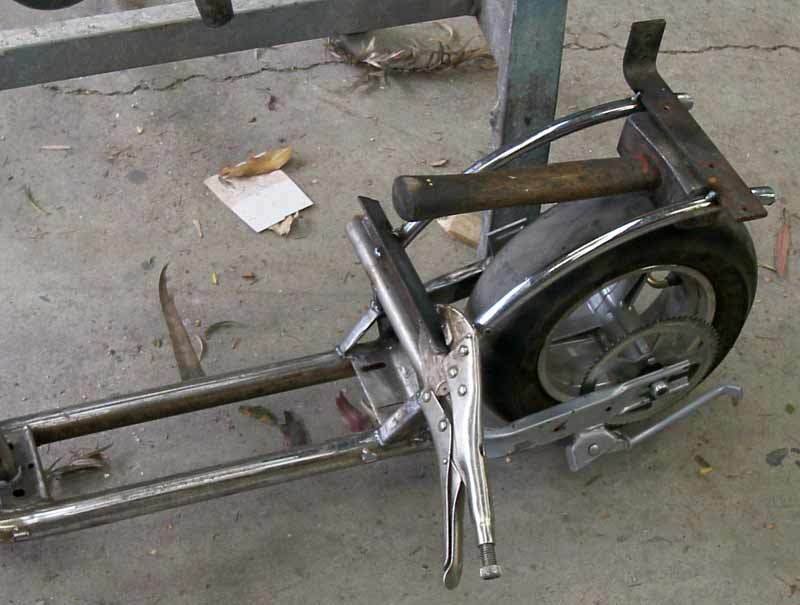
    Aligning the two rear pipes for engine mount brackets. The pipes have two temporary peices of steel welded to them to hold them in place which will be removed once it's welded together.


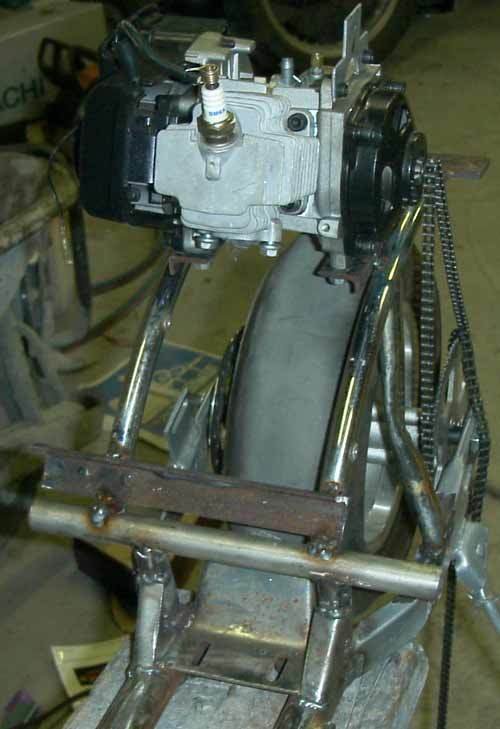
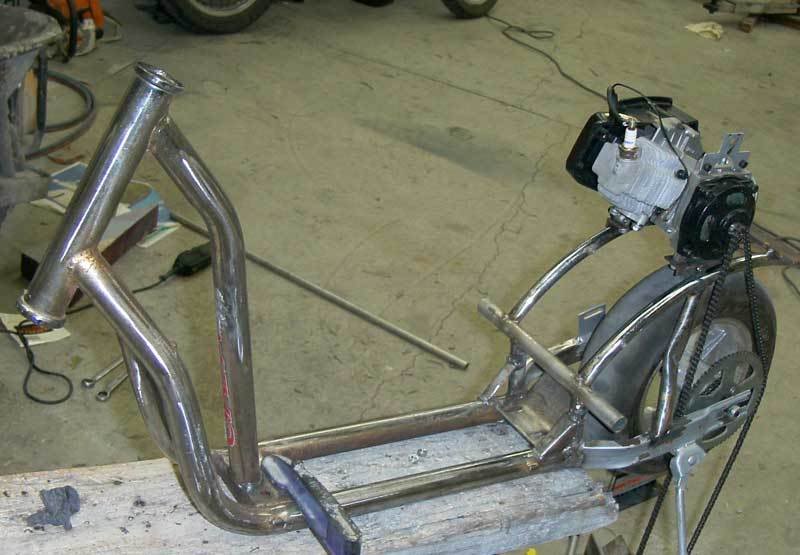
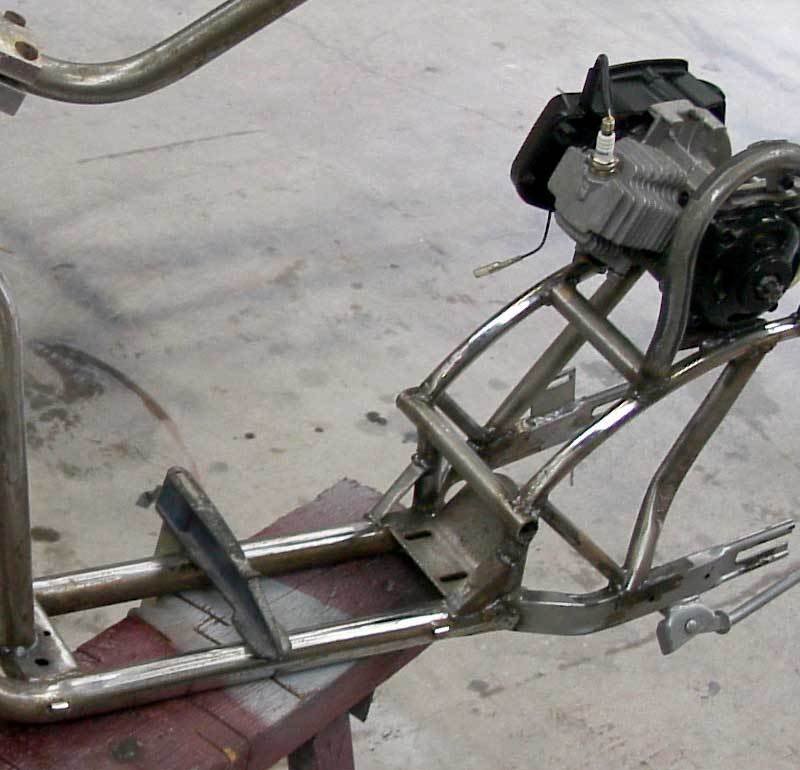
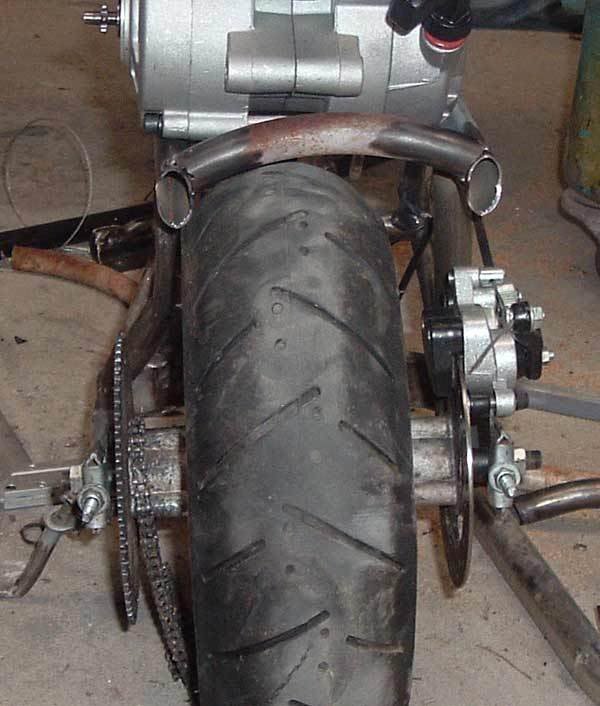
    Engine + mounts tack welded to frame and also additional suport welded that has a bend in it to not hit the chain.


    Front temporary bracing removed.


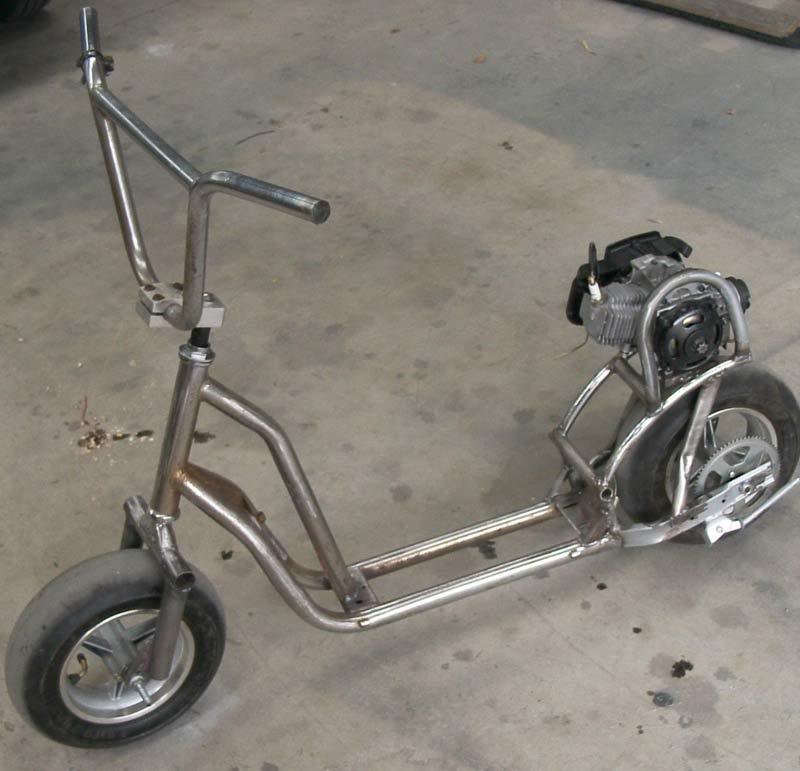
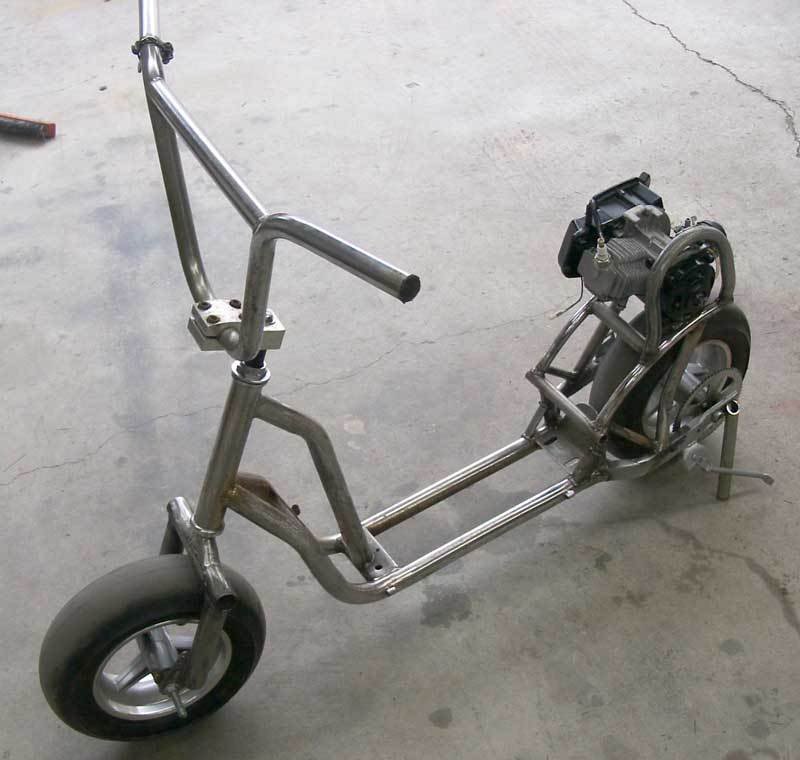
    Forks back in and with higher handlebars fitted.
    Last edited by Sam-Q; 20th December 2008 at 02:26 PM.
    My website: SQ Engineering - 4AGE and 3SGE upgrade/replacement parts

    - SQ Engineering on facebook -

    Please e-mail to contact me instead of sending a private message on here.
  3. #3
    Moderator Sam-Q's Avatar
    Join Date
    Dec 2008
    Name
    Sam
    State
    VIC
    Location
    Endeavour Hills
    Country
    Australia
    Posts
    4,242

    Default


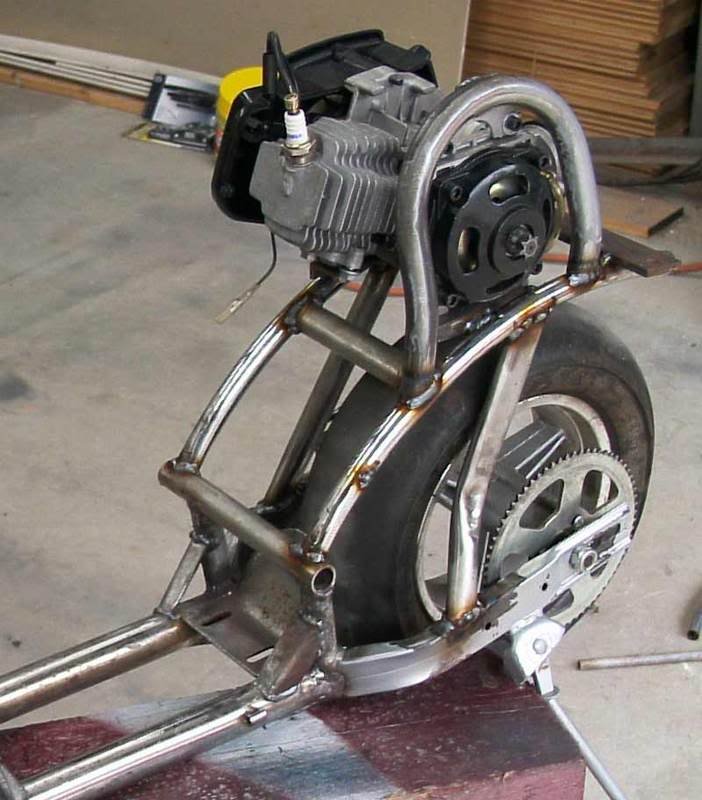
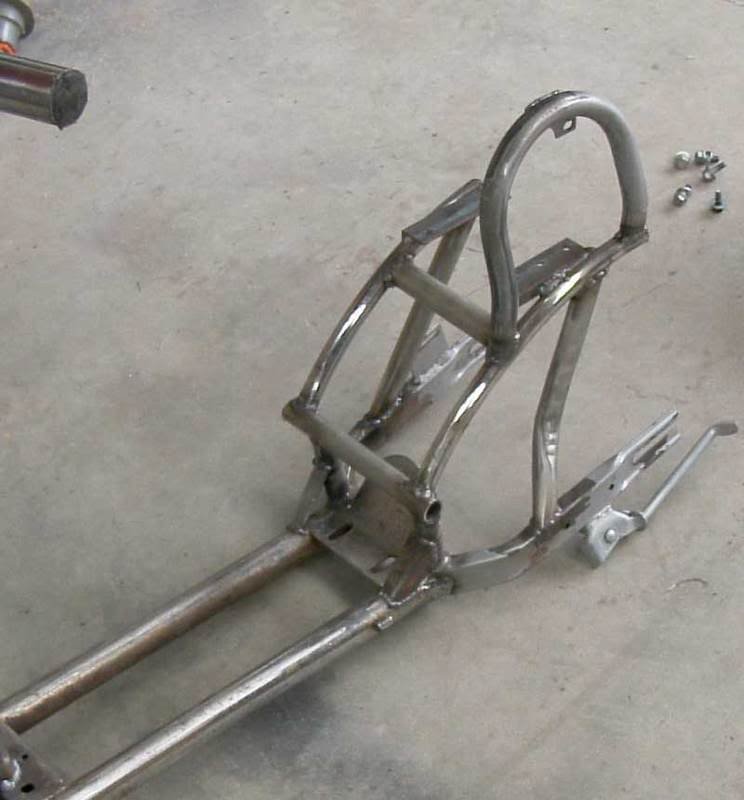
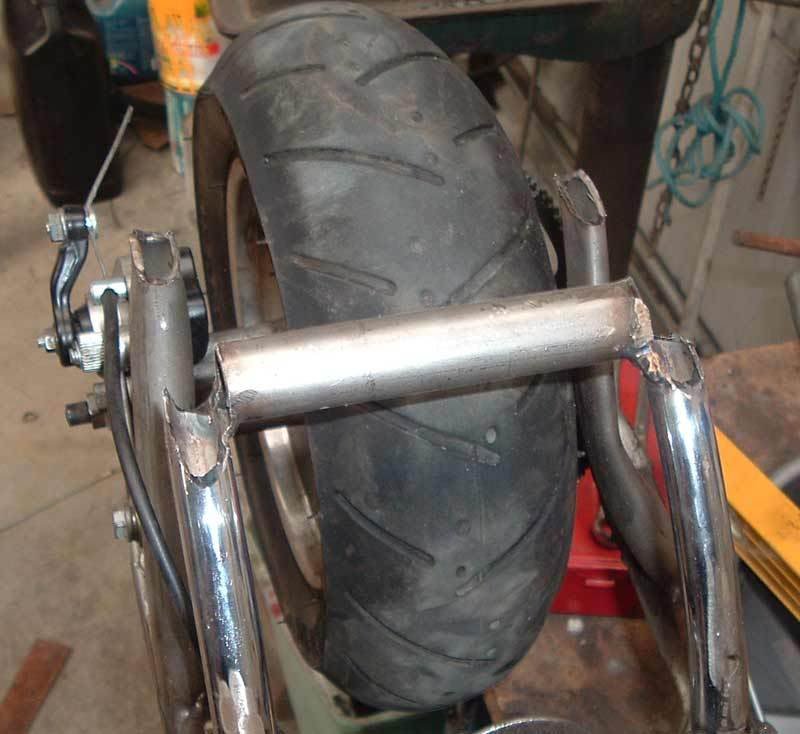
    - New side pipe welded in, pipe on opersite side cut and welded in, top loop
    welded in, top engine mount welded, cross bar cut & welded in and I also welded all the joins that had temporary tack welds holding them together.


    - Engine out with the welds cleaned up and I chopped off the temporary rear section.


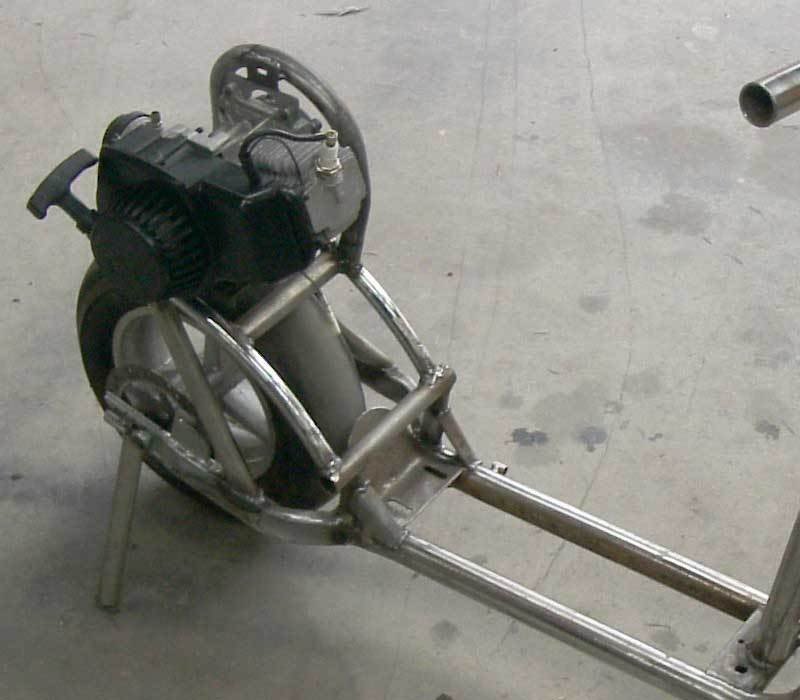
    - Engine reinstalled


    - Cro-Mo diagonal braces welded in


    - Wheel reinstalled


    - As it is currently


    Did some more work:


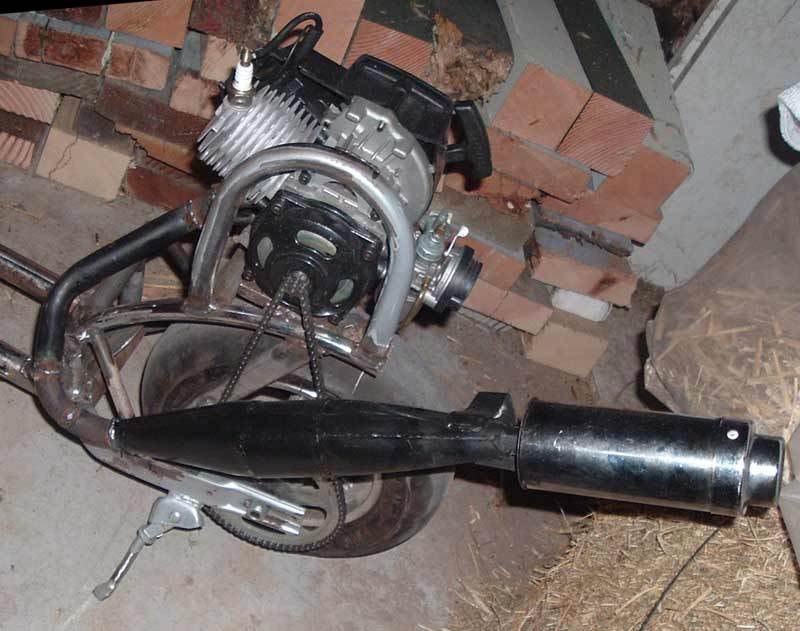
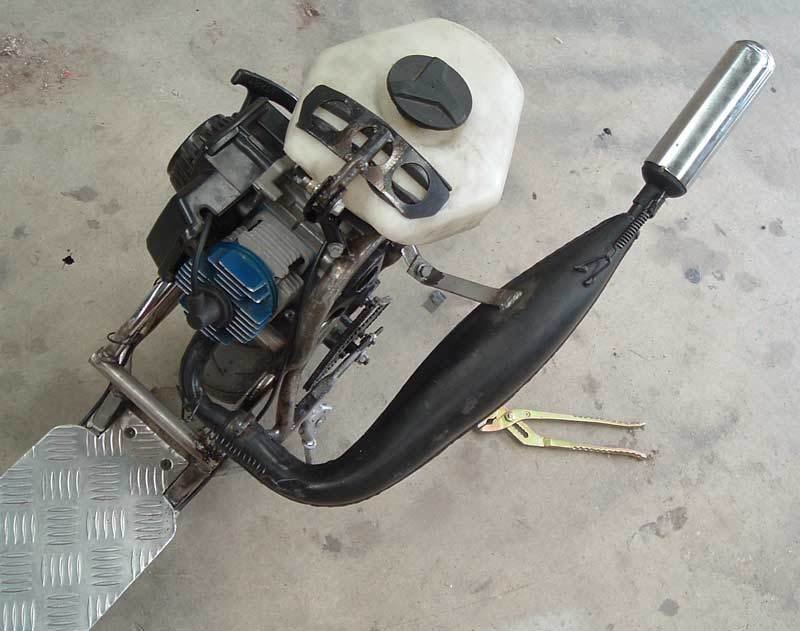
    - I modified an already modified stock pipe to suit my scooter layout. I figue it will work for now till I am ready to install my fat boy pipe. Even though it's temporary I am quite happy with how it sits. When the time comes I will definetly have to install a gaurd so I don't burn myself.

    I also shortened the stand so that it will work for my scooter. Originally on the pocket bike it was in a much higher postion so when i used it for my scooter it no longer worked. I took a 30mm or so long peice out of it and now it works great.
    My website: SQ Engineering - 4AGE and 3SGE upgrade/replacement parts

    - SQ Engineering on facebook -

    Please e-mail to contact me instead of sending a private message on here.

  4. #4
    Moderator Sam-Q's Avatar
    Join Date
    Dec 2008
    Name
    Sam
    State
    VIC
    Location
    Endeavour Hills
    Country
    Australia
    Posts
    4,242

    Default


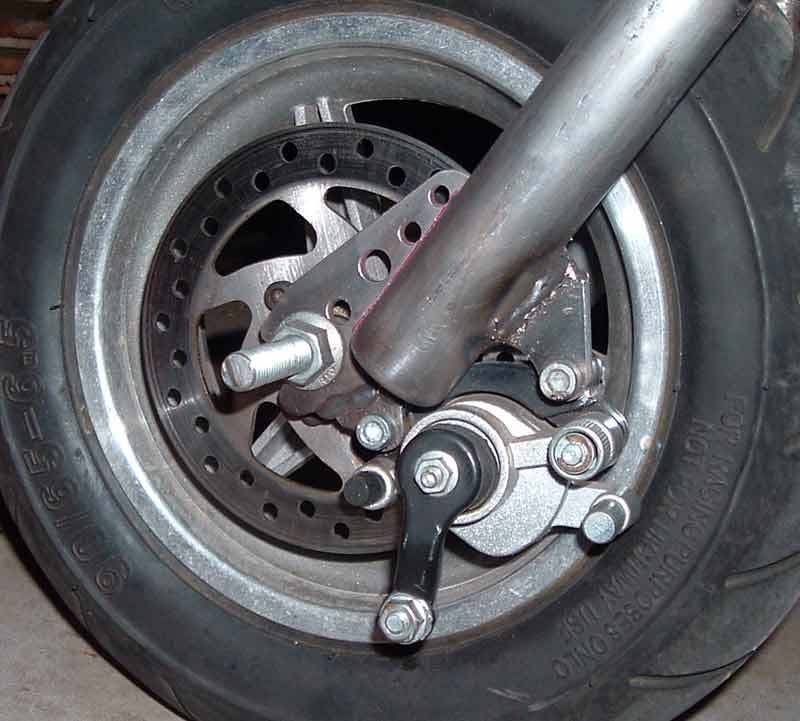
    - Fitted the disk brakes to the front. This was an unusally hard job to do, but now with some time and a serious amount of patience it lines up perfectly and uses all of the brake-pad surface.
    Last edited by Sam-Q; 20th December 2008 at 02:27 PM.
    My website: SQ Engineering - 4AGE and 3SGE upgrade/replacement parts

    - SQ Engineering on facebook -

    Please e-mail to contact me instead of sending a private message on here.

  5. #5
    Moderator Sam-Q's Avatar
    Join Date
    Dec 2008
    Name
    Sam
    State
    VIC
    Location
    Endeavour Hills
    Country
    Australia
    Posts
    4,242

    Default

    Today I spend a unreasonable amount of time making this:


    - I know what everyone is thinking.... 'WTF is that!?'


    .


    A pictures worth a thousand words:


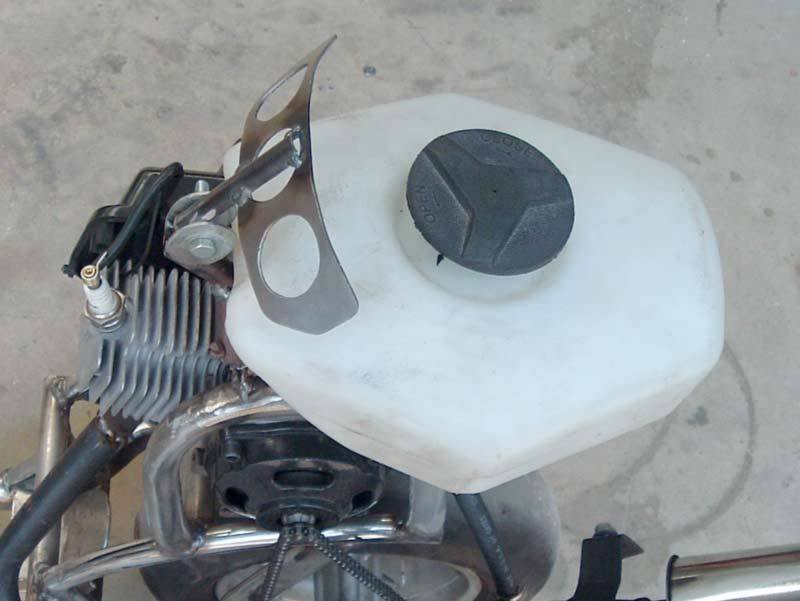
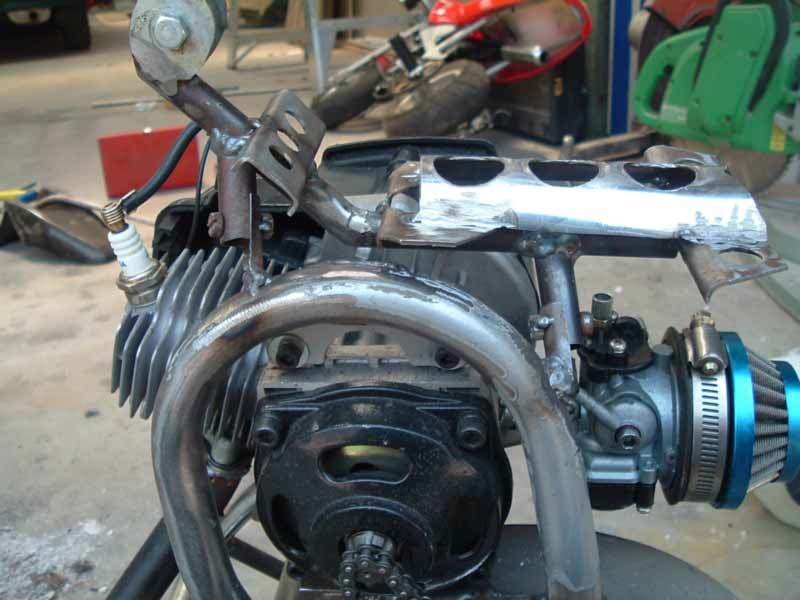
    - This is what I came up with for a fuel tank mount, the round section is Cro-Mo pipe (same pipe as the angled brace on the rear forks) and it's quite light. When in the down position it clamps the tank quite well. I figured I would need this because it would be suject to some intense vibrations. The fuel tank is a slim-line pocket bike tank that is supplied with any fat-boy pipe, it should be enough capacity for me and look ok.


    Next on my list of things is to make this mount bolt to the frame, not as easy as it sounds.


    Another good day of work, unfortunetly it might be the last one in a while.


    - Fuel tank mounted, tank clamped down


    - Clamp in the released position


    - Tank removed with clamp attached to frame.


    - The clamp is attached by Cro-Mo pies that are bolted. This way the mount possitively locates and therfore is very solid and can't move. I used M5 bolts and I will source some decent cap screw high tensile ones of the right length later. My welds for the mounts ended being a bit rough for this one, but atleast it won't break.


    - Showing how the mount unbolts


    - I modifed my tank a little, what I did is I clamped a fuel hose on and then used a heatgun all around near the bottom of the tank. Then once it softened up I tilted the outlet on an angle at the same time as I was pulling it down. This does two things, first up originally the outlet on the inside has a decent sized lip, so the last bit of fuel never would come out, by doing what I did the lip is sunken and all the fuel will come out. Secondly the outlet is now facing where I need it and its not a strain on the tank anymore. Sure I could of lifted the tank but that would make it look less neat. Also as shown in the pic I hooked up the hoses, clamps and a filter. It's short, neat and simple, as a bonus I can still take my tank off without disconecting it.
    My website: SQ Engineering - 4AGE and 3SGE upgrade/replacement parts

    - SQ Engineering on facebook -

    Please e-mail to contact me instead of sending a private message on here.

  6. #6
    Moderator Sam-Q's Avatar
    Join Date
    Dec 2008
    Name
    Sam
    State
    VIC
    Location
    Endeavour Hills
    Country
    Australia
    Posts
    4,242

    Default


    Putting the throttle on and levers in place. A big thanks to Jason from Toowoomba Pocket Racing for giving me these. I decided to keep these handlebars even if they make the scooter look a bit querky. But I do still plan on modifying the gooseneck to be about 10cm longer. I will also make up a longer bolt using a peice of all thread and a long nut.


    here is what I have currently being run in in my pocketbike which will end up in this scooter:


    - 2 peice head kit with 13.5:1 compression
    - tiny boost port
    - 33mm crank
    - 50.1cc
    - dellorto carby
    - fiberglass reeds
    - fat boy pipe
    - lightened flywheel

    parts I have coming or havent installed:

    - tripple stage reeds
    - timing key
    - full circle crank
    - 15:1 head kit and dome

    future mods

    - modifed fat boy
    - central boost port enlarged and 2 more added
    - ported for slightly higher revs
    - balance crank
    - modify the combustion chamber
    - modify the crankcase for more flow
    - modify the barrel for more flow
    - custom dual peddle V stack reed setup?
    - lightened and windowed piston


    did some work during weekdays this time due to my lack of free time


    - Here is the arangement I have so far come up with. I have small sprung V-brake levers for the brakes and a mini lever that I am setting aside for the throttle. I also fitted a cut off switch on the right hand side.


    - I bought a length of all thread so I could make this extra long head stem bolt. To make it I welded on a car spec nut onto the end of the all thread and then ground it down to make it neat. I needed it so long to suit this...


    An extra long head stem! To make this I took the original head stem, chopped the pipe off an old head stem I had, welded it onto my original


    - I started and finished my deck, I really like how it turned out. I think it looks mean as is simple and light. I used counter sunk M6 screws and recessed them to be flush. I cut the plate back near the front vertical pole so that it clears the weld. I did this so that I wouldn't have to grind the weld back and potentially cause a weakness.


    - Front cable put in place, attached the cable to the brakes and adjusted them. I also fitted the rear brake cable and heat-shrunk the wire from the kill switch along with it. Now that I did this it looks like one cable.


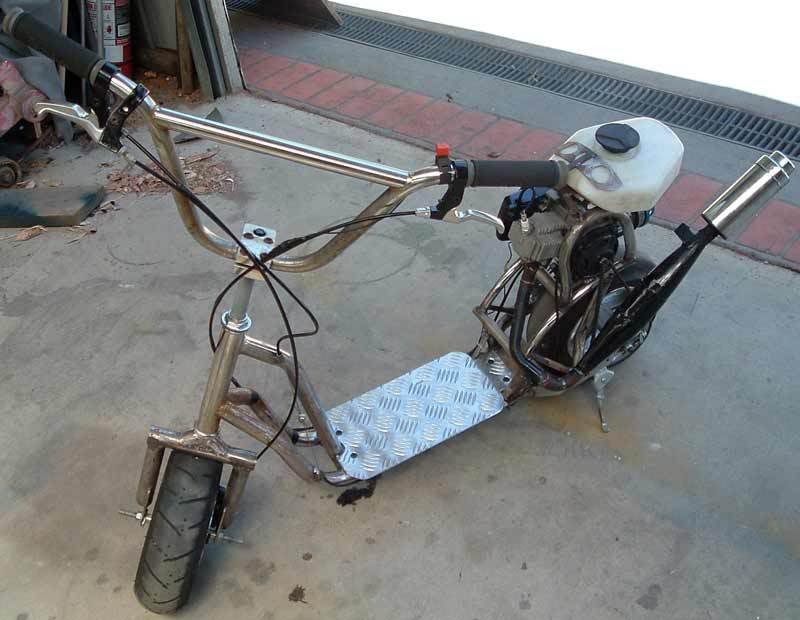
    - As it stands now, I am really happy how its looking. It is still very light and easy to use. The front brakes also pull up real hard. Notice the tall headstem with some temporary primer on it. I need to borrow some scales and check this thing compared to my pocket bike, because it may be lighter. One other interesting thing is the fast I can actaully bunny hop this thing with everything attached atleast 10cm, now that is unusual for any scooter. I am hoping that because of the light rear-ward weight I might be able to do some nice wheelstands with some carefull weight trasfer and some power.


    Next up: Custom throttle link and cables + rear brakes + custom tensioners

    after that its ready to ride!!! I can't wait.
    My website: SQ Engineering - 4AGE and 3SGE upgrade/replacement parts

    - SQ Engineering on facebook -

    Please e-mail to contact me instead of sending a private message on here.

  7. #7
    Moderator Sam-Q's Avatar
    Join Date
    Dec 2008
    Name
    Sam
    State
    VIC
    Location
    Endeavour Hills
    Country
    Australia
    Posts
    4,242

    Default

    well it finally runs!


    Here is how I did my custom throttle cable, I just clamped two cable together, great to work on and does the job flawlessly. I also made it do the cable has a section further up the frame for decreased friction.


    A closer look,the clamp is off a brake caliper that has been customised and some washers added for clamping.


    The rear brake cable; this also has a bare section for decreased resistance, it was at first much harder to use that the front but with this and some PTFE lined cables its pretty good now.


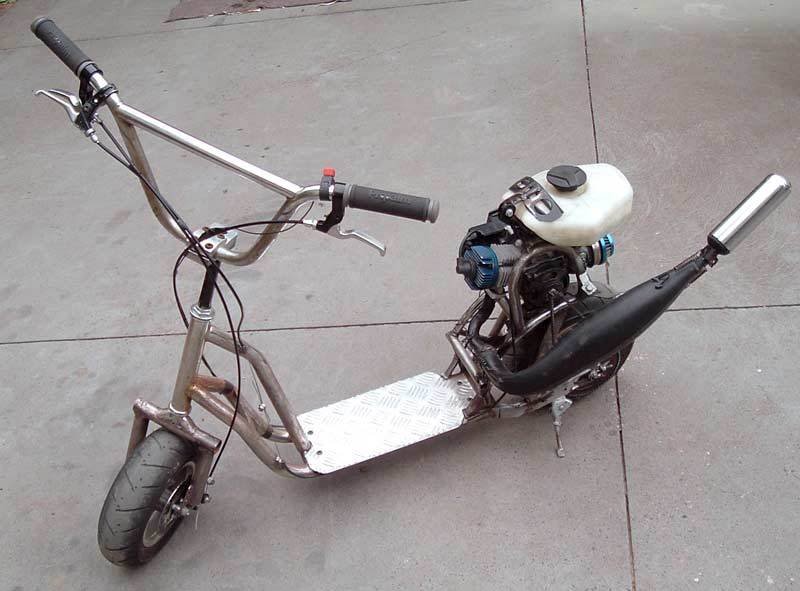
    Complete!


    I will do another update to explain what has since happened. But I will say right now I think in due time I will be able to do some killer monos and it's a blast to ride.


    I initually ran the engine with no spark plug cover and not suprisingly I copped a few shocks. Other than that it ran great and felt good. I fitted a rubber boot over the spark plug and also went to fit my other engine.

    What happened is that I was ready to change the engine and I did. Interestingly enough the chain was adjustable perfectly for the previous engine but when I swapped to my decent engine it wouln't fit. It seems that theres a bit of a difference between castings and the heights of the mounts. I tried running a chain a link longer but it was too long. I bolted it up still and used it. I rode it and it had twice the power and that was with the standard pipe, it was great.

    I initually filed the engine mounts down a bit to level it a bit like I did with the other engine, but to correct the chain length issue I filed it down some more and retried it. It didnt make much of a difference so I took it back off and then got the grinder out and took more off. I retried and it seemed like I took too much off. I tried two different sizes of washers and I when tried the thinner one it suited perfect.

    However when i tried to start it it was dead. I spent half a day trying everything and I found nothing. Finally I put my orginal engine back in and it fired up. I figure I just popped a seal somewhere or something I will find out soon.
    My website: SQ Engineering - 4AGE and 3SGE upgrade/replacement parts

    - SQ Engineering on facebook -

    Please e-mail to contact me instead of sending a private message on here.

  8. #8
    Moderator Sam-Q's Avatar
    Join Date
    Dec 2008
    Name
    Sam
    State
    VIC
    Location
    Endeavour Hills
    Country
    Australia
    Posts
    4,242

    Default

    my scooter as it was:


    I adapted the fat boy power pipe, but purposefully made it 10mm too short to tune it.


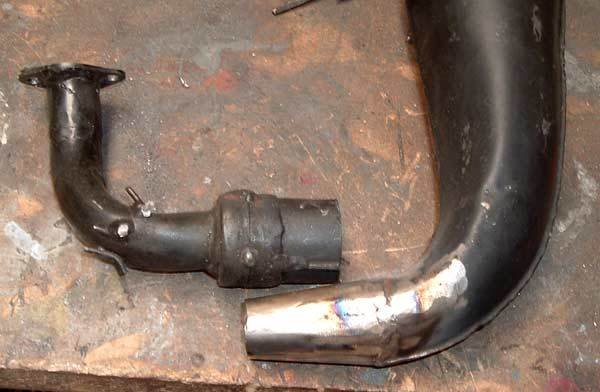
    The section of the pipe I never liked, I thought this would be bad for it so I wanted to replace it.


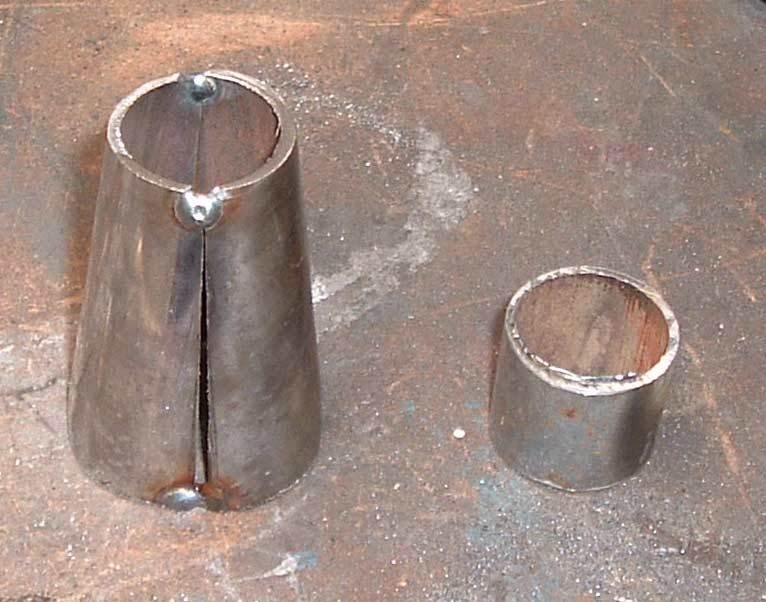
    So I started to make up a new expansion section.


    Lining it up.


    One end welded in and marking out where to cut.


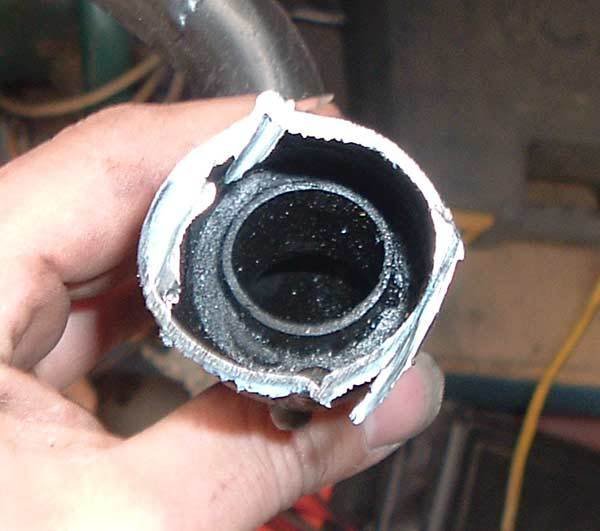
    The nasty step in the old pipe that I thought wasn't helping.


    All welded up.


    Bolted on and painted.


    How it is now.
    My website: SQ Engineering - 4AGE and 3SGE upgrade/replacement parts

    - SQ Engineering on facebook -

    Please e-mail to contact me instead of sending a private message on here.

  9. #9
    Moderator Sam-Q's Avatar
    Join Date
    Dec 2008
    Name
    Sam
    State
    VIC
    Location
    Endeavour Hills
    Country
    Australia
    Posts
    4,242

    Default

    looks like I am going to sell off all my old cag engine parts and not use them ever again, because I have this.....


    a F1 Balata rep 40cc engine thats rated at 7hp standard. I also got a rep 19mm Dell'orto carb (original 14mm), different pipe and 2 x tripple stage reeds. It should tottaly haul arse


    the engine mount was no good to me in that position so I wanted to see if I could reverse it so it faced down. I took the head off and while I was at it I took the bore off to see how it was made and why it made so much power.

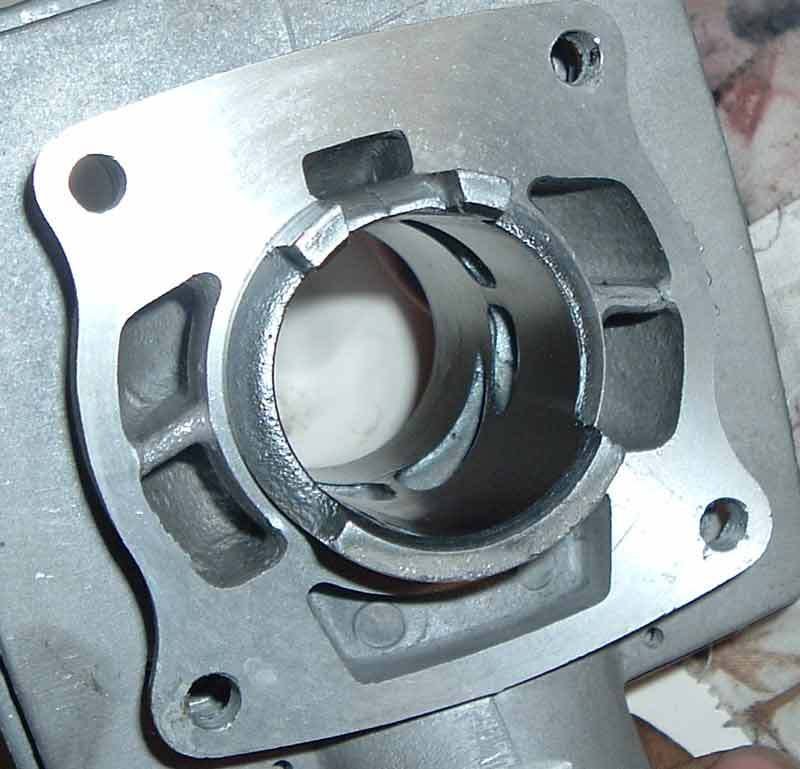
    Heres with the head off and the piston at BDC:


    the ports are absolutley huge in this thing, the exhaust ports take up like 1/3 of the whole diameter and there are 4 transfer ports and 1 boost port.


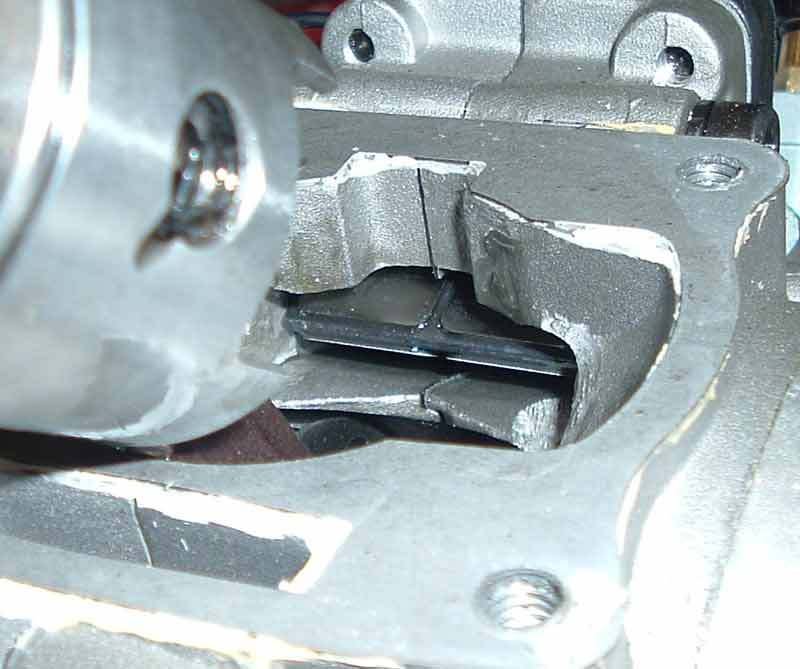
    Heres another pic of the bore with the barrel removed:


    and of the V stack reed system, its very large, very close ot the piston and most suprisingly it has had some aditional hand porting beween the intake and the transfer ports. I have never seen such quality in a 2 stroke and it came out of China which is downright scary.


    and yes I did manage to reverse the head. I have designed most of the new frame and I will have to do some major chopping to make it fit. I hope to do it this weekend.
    My website: SQ Engineering - 4AGE and 3SGE upgrade/replacement parts

    - SQ Engineering on facebook -

    Please e-mail to contact me instead of sending a private message on here.

  10. #10
    Moderator Sam-Q's Avatar
    Join Date
    Dec 2008
    Name
    Sam
    State
    VIC
    Location
    Endeavour Hills
    Country
    Australia
    Posts
    4,242

    Default

    I managed to do a real good days work, which I was quite happy with seeing that day was meant of been 38 degrees.


    Heres what I started with, engine out, top support bracket bent up:


    With the top part chopped off, it wasnt easy doing this when it was so hard to line up and worked so well.


    I made up a U shape out of cro-mo steel and I wanted to max out my clearences. So I decided to keep grinding it down till it only just cleared the wheel, heres how it looked when it was the right height and dead level:


    New section tack welded in and looking good


    Engine roughly in place without thrid bearing sprocket support, notice the curved rear pipe that I used to clear the wheel and have the side supports lower.


    ends of the bars shortened and chopped vertical, new U suport welded in for the front engine mount (also Cro-Mo steel), chain in place for basic alinment checks and also some of the pipe ground down on both sides to lower the engine even further.


    Front engine mounts in but not welded so I can get the alingment right. I later used some spacers at the front to get the heights right.


    Front section welded on properly (so to speak),front mounts tack welded on and one of the two rear engine mounts welded in.

    Thats all I have done right now and I will need to grind more of the pipe away to clear the engine and then weld a plate in to cover the hole. The other rear mount needs to be made but that should be real easy now the alinment is all good (I think!!!)

    it looks like I will be temporarily be using the pipe in the stock position and mount the fuel tank off the side, I do plan on modifying it the same as my last pipe but I want it to just run first and then maybe experiment with pipe mods before reshaping it into an elaborate shape to suit the frame.

    I also plan to make my own stainless steel fuel tank, should look and work great.
    My website: SQ Engineering - 4AGE and 3SGE upgrade/replacement parts

    - SQ Engineering on facebook -

    Please e-mail to contact me instead of sending a private message on here.

Page 1 of 7 1 2 3 4 5 6 7 LastLast

Similar Threads

  1. Project Q - Sams 86 (many tech Pics)
    By Sam_Q in forum AE86 Owners Forums
    Replies: 243
    Last Post: 28th November 2012, 11:17 AM
  2. Road death toll???? what about the death toll in Hospitals.
    By Frak in forum Offtopic Discussions
    Replies: 24
    Last Post: 1st August 2009, 10:41 AM
  3. Death to the 180
    By Eircamae86 in forum Offtopic Discussions
    Replies: 13
    Last Post: 26th July 2009, 11:21 PM

Posting Permissions

  • You may not post new threads
  • You may not post replies
  • You may not post attachments
  • You may not edit your posts
  •