Page 7 of 55 FirstFirst 1 2 3 4 5 6 7 8 9 10 11 12 13 14 15 16 17 ... LastLast
Results 61 to 70 of 546

Thread: 2AZ powered 86

  1. #61
    Veteran LittleRedSpirit's Avatar
    Join Date
    Dec 2008
    Name
    Matt
    State
    QLD
    Location
    West
    Country
    Australia
    Posts
    1,988

    Default

    Thanks man.

    I think so too!


  2. #62
    Veteran LittleRedSpirit's Avatar
    Join Date
    Dec 2008
    Name
    Matt
    State
    QLD
    Location
    West
    Country
    Australia
    Posts
    1,988

    Default

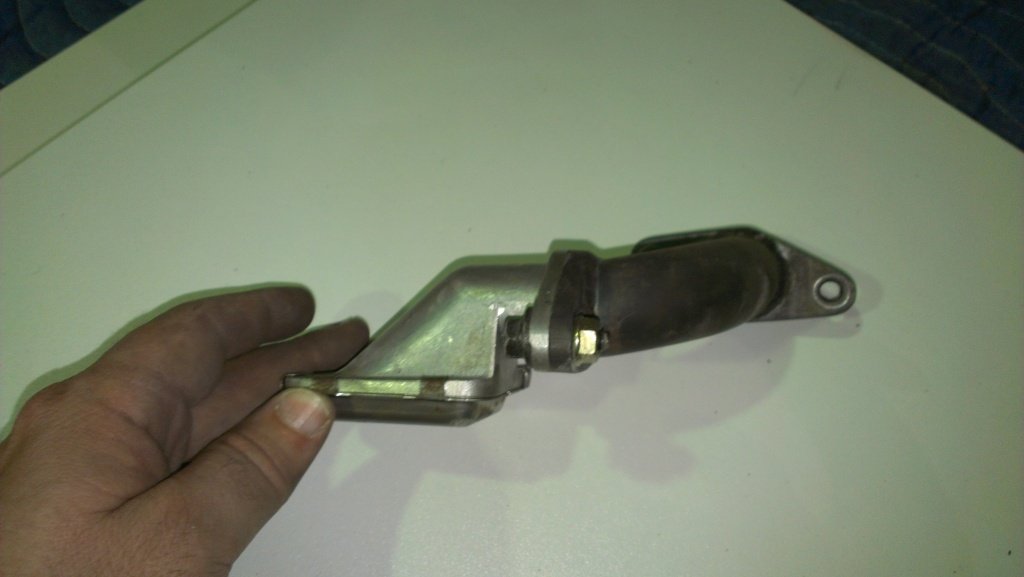
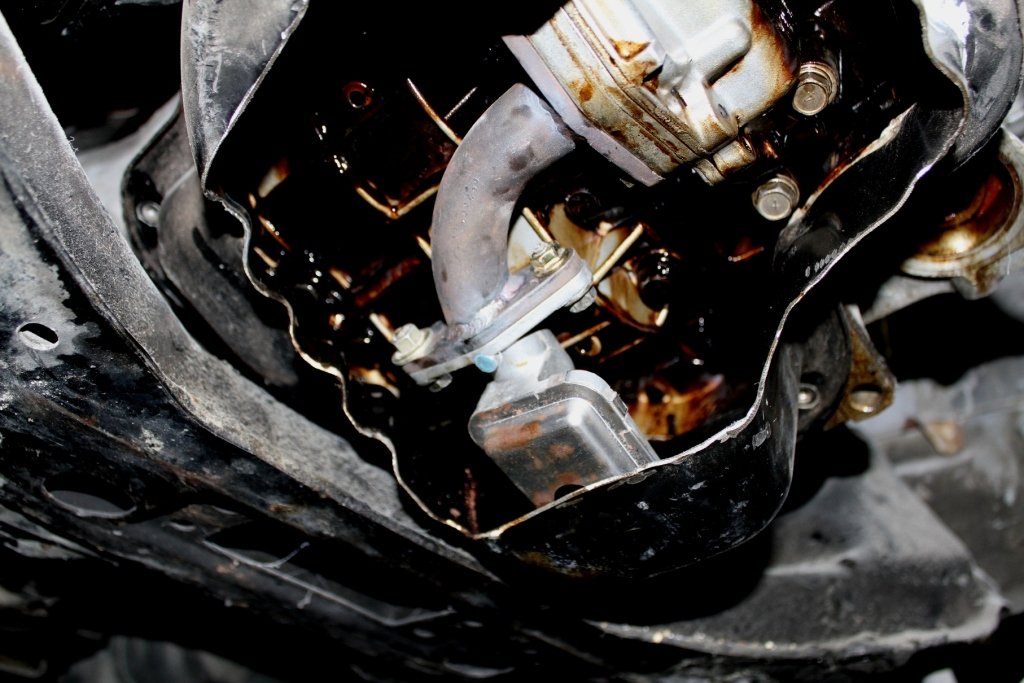
    Now I have extended the oil pickup to the lowest area of the sump.

    Have correct belt tension, and I have had fabricated a long cooling pipe extension to get the water from the inlet side instead. this saves clutter on the exhaust side and neatens things up.

    I have also bought a celica radiator for it.


  3. #63
    Senior Member Panda BVB700's Avatar
    Join Date
    Jul 2010
    Name
    Brenton
    State
    VIC
    Location
    Woodend
    Country
    Australia
    Posts
    408

    Default

    looking good keep it up pretty interesting read alot of good fab work here aswell should be good
    adm ae86 now one hell of a project
    ae71 small project

  4. #64
    Veteran LittleRedSpirit's Avatar
    Join Date
    Dec 2008
    Name
    Matt
    State
    QLD
    Location
    West
    Country
    Australia
    Posts
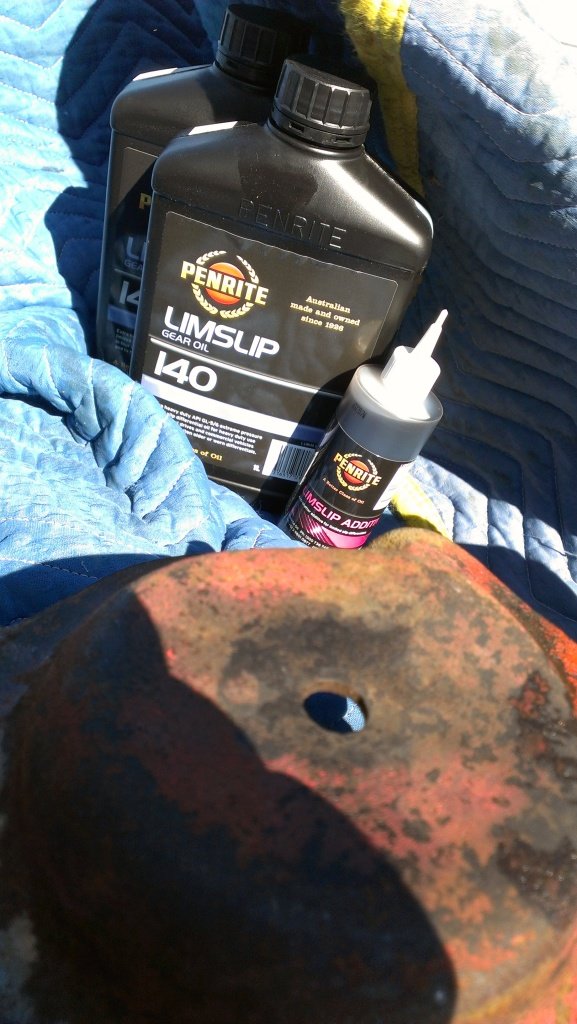
    1,988

    Default

    Thanks mate, collecting the radiator tomorrow from the post office, hopefully it fits good and lines up with the hoses.

    Missed an altezza lsd on ebay this morning. Shitted me to tears. Was going for a good price, lets hope the guy who won was a tyre kicker and I get a second chance offer.


  5. #65
    Veteran LittleRedSpirit's Avatar
    Join Date
    Dec 2008
    Name
    Matt
    State
    QLD
    Location
    West
    Country
    Australia
    Posts
    1,988

    Default

    Been knocking the list down to size:
    Still need a tailshaft
    Have modded the diff already.
    Have bought the lsd and built the diff
    Leaving the rear brakes till the car is running and OTR.
    Leaving the CP 11:1 pistons out of the motor until the oiling system changes have been tested.
    Have made and finished the coolant lines.
    Have the raw loom to wire it.
    Need to buy ecu.
    Need to tune still.

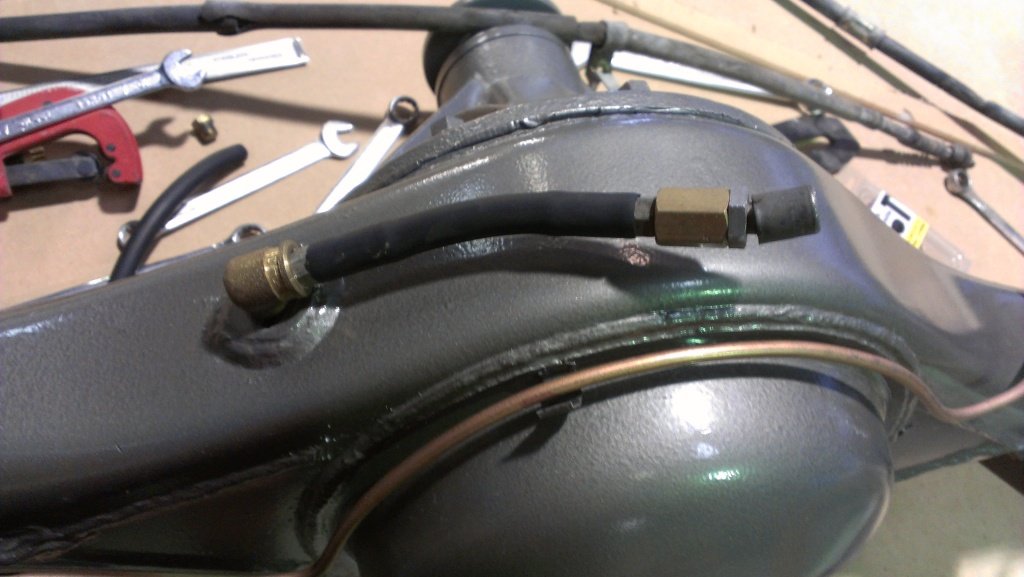
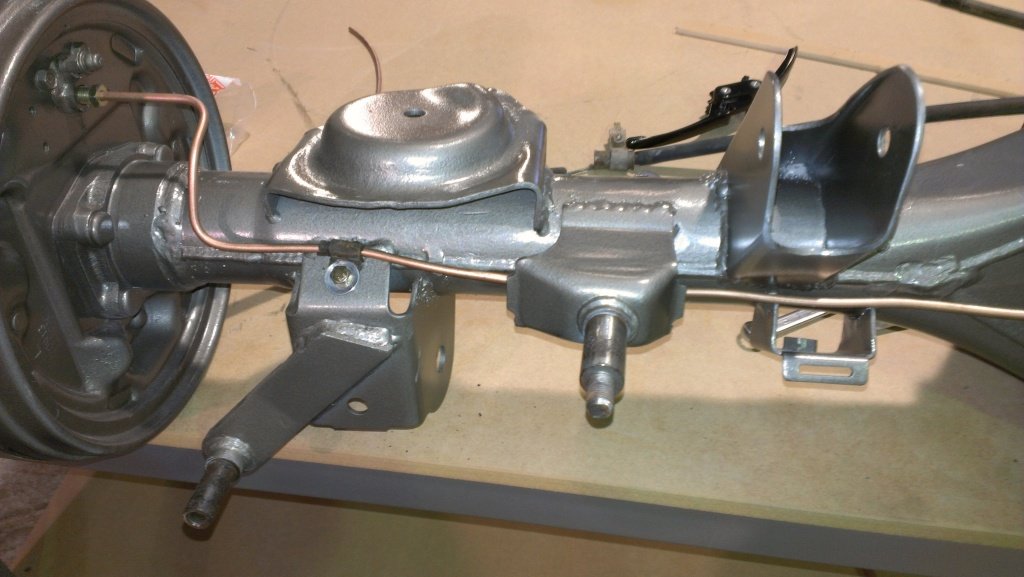
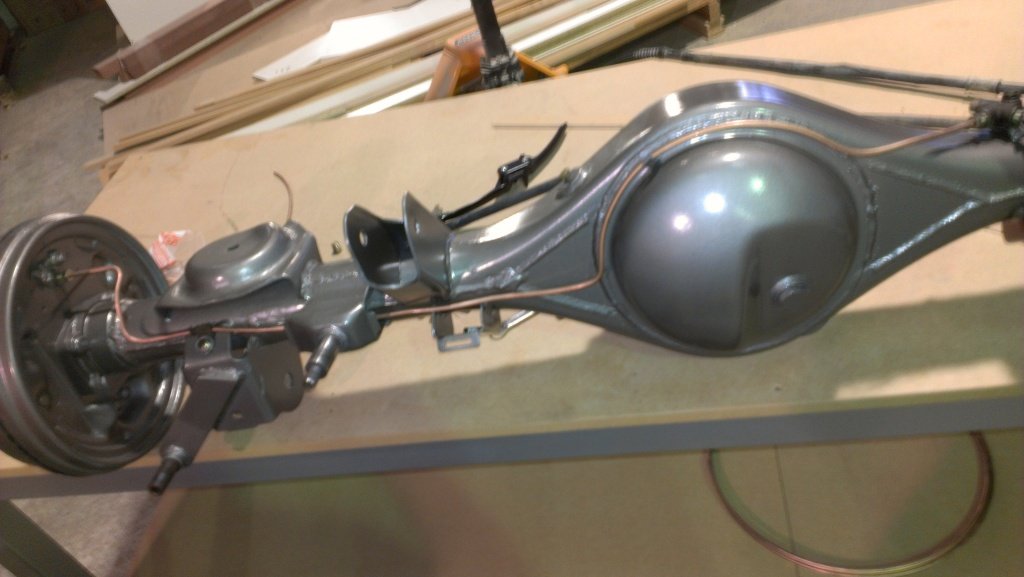
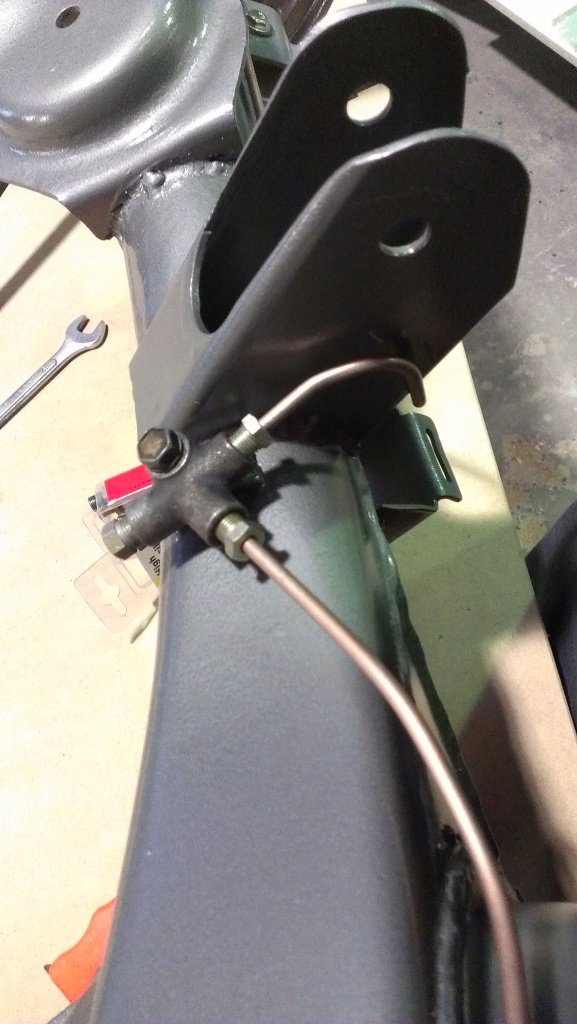
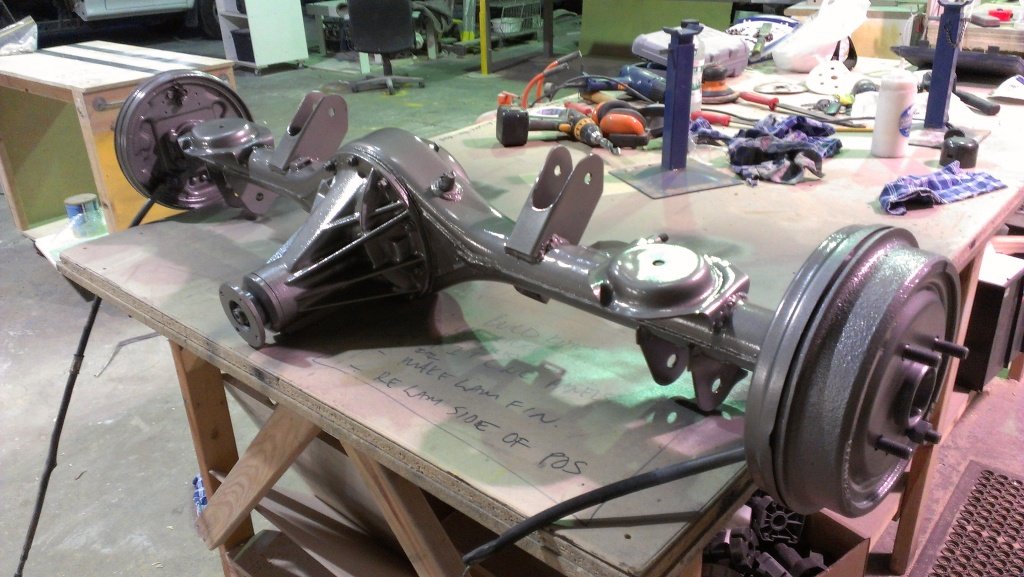
    So the diff is an MX13 one. It has had a type 2 lexus IS200 torsen lsd centre fitted with the original mx13 gears (3.9). This combination didnt need a spacer under the crownwheel to be built like most say. Sam Q has just sourced me the press to fit baffles from a later diff housing. That pretty much completes what I plan to do on the diff for the time being, as the rear brakes have a few miles left in them, and it would be simpler to just get it running with those brakes till its OTR. Once the mods were done, I decided to soda blast the housing myself and I finished it with an etch primer and some gunmetal metallic hammer paint. Looks horn. I also bent up some brand new bundy lines for the brakes and installed brand new flare nuts too.

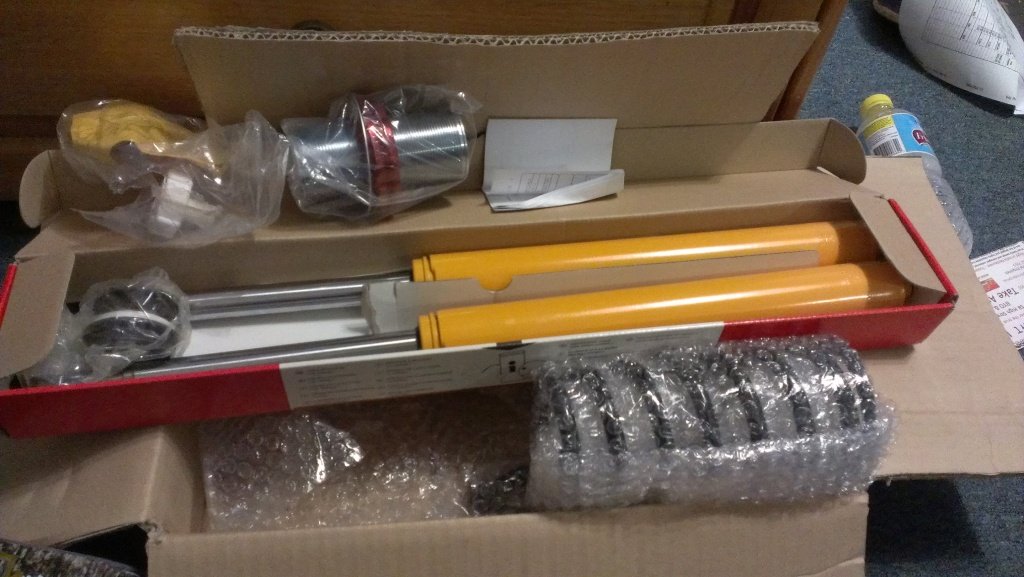
    I have also started on the front suspension. I bought a 6kg hsd coilover kit with the helper springs. I also bought sw20 MR2 Koni yellows brand new and some RA40 front struts/brakes/control arms. Im having them coilovered to suit the body length of the sw insert. The RA40 strut has a removable caliper mount like an ae86 or ke strut, which lets you make upgrade brackets without machining a cast xt130 caliper bracket back to square. Not sure exactly what will fit in the end, but I wanted the bigger bearing size in these struts as a base anyhow, and the rotor is bigger than a stock ae86 but slightly smaller than an xt130 rotor.

    I have been doing polishing and finishing where necessary. I've been reading and told that its better to polish oil galleries, so my mate showed me how to make an emery cloth polishing jug from an old screwdriver shaft and a die grinder. I have now buffed the inside of my oil extension pipe. Looks amazing. Its dead easy.

    I needed a way to mechanically lock off the tensioner so I invested in some m8 rose joints and a tensioner and in about an hour was able to make the tensioner work great. I had an m10 stud spun down to m8 and rethreaded so I could bolt the rose joint on to the old tensioner boss. Works amazing. Might need to clearance the back of the tensioner a bit more to get a tiny bit more swing, but thats no big deal. Im just waiting on some left hand nuts from the UK to lock it off with.

    I have sourced the radiator fans from a zzt230 celica to bolt to the aftermarket zzt radiator I bought. I pray they fit without me needing to modify the radiator mounting arrangements I already have. I think there is just enough clearance there. I have tilted the radiator back as the outlets come in on an angle and it seems to make sense, as well as having the advantage of lowering and moving the weight of the full radiator back from the extreme front of the car.

    Looking forwards, I need to collect the front suspension from the fabricator (rick sendall), rip out the motor and box when I know the radiator fits, and drop it over to NPC to help organise a better flywheel.

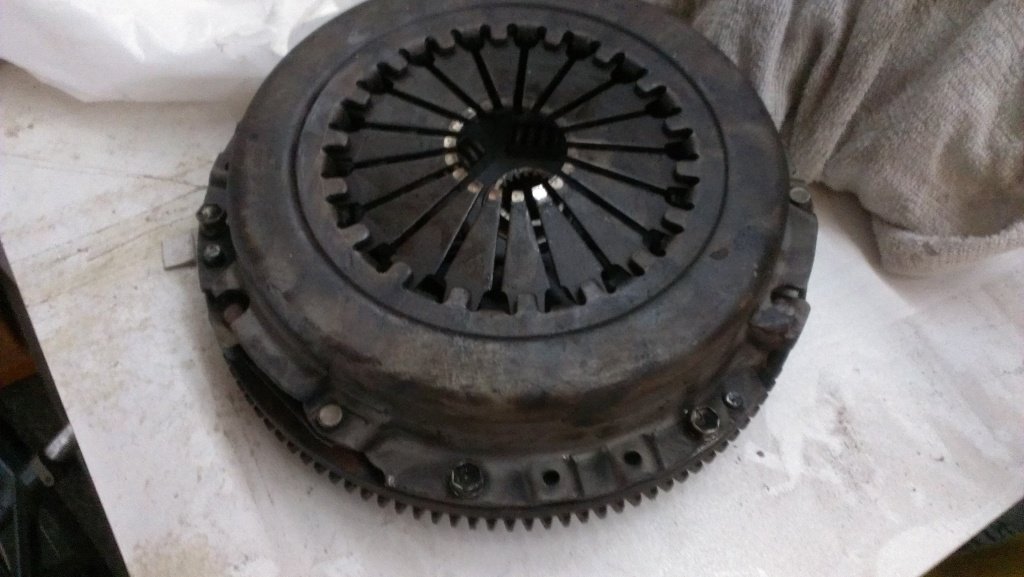
    I have given it a lot of though. I was obviously planning to use a Y bellhousing with a bigger than Y sized flywheel. The bigger flywheel fits in the Y bellhousing fine with the 2azfe clutch attached. However the kinda shitty part was the fact that you had to make a starter to fit the arrangement from 2 other starters and even then it was a finnicky thing as you had to flare a bolt hole 2mm to make it bolt up and there was potential for it to come loose and mislocate easily.

    I decided it was a lesser evil to go down one size in flywheel, use the Y motor flywheel that originally was supposed to go with the Y bellhousing ad starter. That way, its all stock parts except I will need to change the bolt pattern on a Y flywheel to the 2azfe pattern which is unique amongst Toyota motors for some reason. That way, once done, I can use an inexpensive clutch that is smaller than 2azfe, with hopefully less rotating mass once its lightened. It will have the obvious advantages of being set of stock parts that are easy to source as a set and cheap enough to bother.

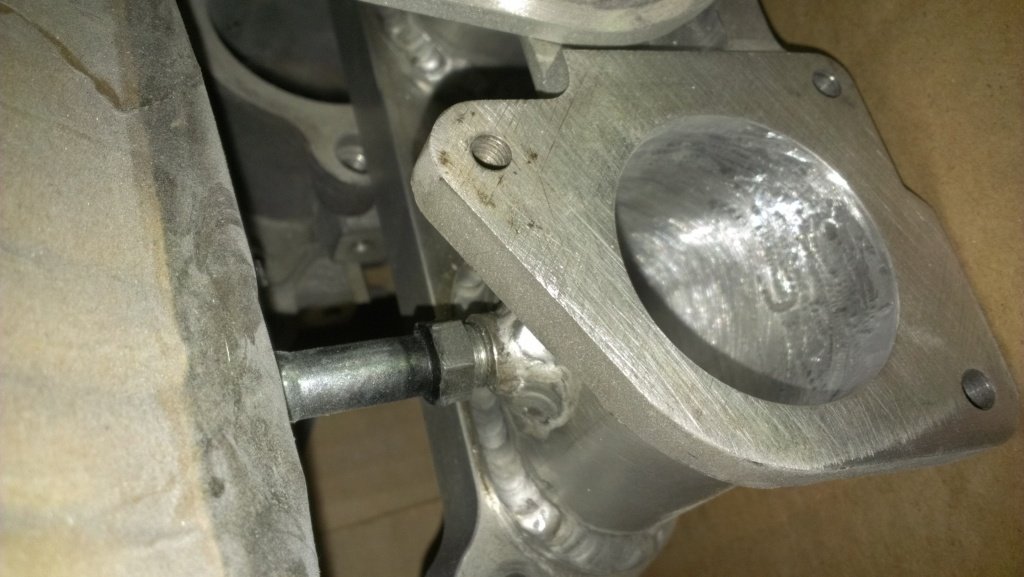
    Im going to do the emery hone trick on my inlet manifold also, but do it multiple times with finer emery so it ends up like a mirror everywhere above where the fuel is input. I want this inlet to really flowair fast as the pipe size has been kept minimal on the manifold for torque creation.

    I have sourced a fibreglass hatch and a fibreglass D max bonnet for the build as well. SO I can push on with doing the body also. Im most likely going to use polycarbonate for the rear window in the hatch as I want to save as much weight as possible, with the idea that I will get a cage installed one day in the not too distant future.

    I've given fuel system some thought. I will look for a Bosch 979 pump I think, its 165lph, 5 bar pressure (2azfe needs 4 bar). I have an adjustable reg, 2 litre surge tank and a carter lift pump already for it that came in my ae86 when I bought it. I have purchased an aem large bore fuel rail that lets me fit a more common return type fuel system to the 2azfe. I think its better this way. The 2az is only done return less in the factory to save money and emissions, it means nothing for the performance.

    I also need a vacuum manifold that can feed idle control. I dont want to use a linear type one as I dont think it will share air between the ports evenly. I might end up making something that is modelled after in inlet manifold but much smaller. If you can imagine a tiny inlet manifold for a 4 cylinder car, it would have the map sensor tapping the side of the chamber, have 4 even flowing ports for the connections to the inlet runners, and it would have the idle controller where the throttle body would be. This would distribute air to the ports evenly and allow a smooth idle I think. My brake booster is supplied with vacuum from the back of port 4 in the inlet manifold.

    Heres some piccys!

    The y flywheel clutch combo


    Oil Pipe and screen


    Inlet manifold with porting done, needs a polish inside


    Tensioner


    Front end parts


    Rear end


  6. #66
    Veteran stahlz_ae86's Avatar
    Join Date
    Dec 2008
    Name
    Paul
    State
    VIC
    Location
    Melbourne
    Country
    Australia
    Posts
    1,480

    Default

    Good choice, I've done a couple pairs of caliper brackets for mine and my brothers cars. We use a Citroen Xantia disc (283mm x 22mm) with the FC calipers. I've had a quote to get a batch of the brackets made up and offer them as a group buy but the quotes were a bit high, so I'll be handing the drawings on to a mate when he's back from o/s to see if he can get a better price

    My brothers sprinter is also running the same setup just with excel G instead of the koni and he's pretty happy with the handling.

  7. #67
    Gone
    Join Date
    Dec 2008
    Name
    Joel
    State
    NSW
    Location
    Picton
    Country
    Australia
    Posts
    4,042

    Default

    excellent choice in oils

    like to share? sounds like cool tool
    Last edited by sundee; 15th November 2012 at 02:57 PM.

  8. #68
    Veteran LittleRedSpirit's Avatar
    Join Date
    Dec 2008
    Name
    Matt
    State
    QLD
    Location
    West
    Country
    Australia
    Posts
    1,988

    Default

    Im very keen to see this setup. Particularly how it goes with the fc and spoke clearance. If its only a few mm it would be an ideal setup. Its exactly the size rotor Id be happy with. I assume its vented. I also think you will have more spoke area caliper clearance just by using ra40 bits. Its a slight bit different to ae86.


  9. #69
    Veteran LittleRedSpirit's Avatar
    Join Date
    Dec 2008
    Name
    Matt
    State
    QLD
    Location
    West
    Country
    Australia
    Posts
    1,988

    Default

    Haha, the diff shop supplied the goods, and the bottle of friction additive also as part of the build. They said if I wasn't going to run baffles to put both bottles and all the additive in, drive for a bit, then drain some out but leave it quite overfull. I think Ill run it maybe 15-20% overfull and Ill be installing baffles. Sam Q has just found me some and will be sending them up soon. Legend.

    The tool is pretty simple, but effective as all hell.

    Just take any nice and straight screwdriver with a 1/4 inch shaft (most #2 phillips for example).

    Cut out the hardened shank and leave it as long as possible.

    Using an ultra thin cutting wheel, carefully slice down the tip to create a slot that emery tape can be stuffed in. Go as deep as you dare. Tip: It helps to use a phillips as the tip is more balanced when cutting and you can go diagonally into the slots between the cross as a guide for straightness.

    Then get a bit of emery paper and tuck it into the slot so it jams in there on the grit and then fold the edges opposite ways either side of the shaft to help hold it in there. Wrap the tape around the shaft a couple of times. It depends on your diameter of tubing that you want to polish as to how much emery tape you have rolled up on the tip of it. Make sure the tape isn't too coarse if you are doing alloy, as it will blow through it quickly if you lose focus. Use some crc to get a brilliant shine while you do it.

    Its important that the tape is a bit wider than the slot is deep, so that the tip of the screwdriver cannot score the inside of your tube. It must be wrapped and protected with enough emery paper.

    It takes a bit of practice to get the right amount of paper. Please put your tubing in a vice or clamp arrangement so you dont end up whipping your hand like I did, and wear eye protection. If its a short enough pipe you can polish one end while you look into the other, and make sure you enough light so you can see what you are doing. I buffed away 90 % of the pipe seams inside some steel pipe that had a 90 degree bend in it in about 3 minutes doing this, and this was with some worn out 60 grit. For alloy start kinda fine and lubricate it well, definitely dont try and use 60 grit.


  10. #70
    Veteran LittleRedSpirit's Avatar
    Join Date
    Dec 2008
    Name
    Matt
    State
    QLD
    Location
    West
    Country
    Australia
    Posts
    1,988

    Default

    I have just ordered some phenolic sheet so I can make heat insulating gaskets for the itbs.

    Might make some for the 20v car aswell, its just a matter of making 8 of them.

    The sheet is pretty cheap, just found a us ebay dick that has a lot of it, so for $33 I have enough coming to do a lot with.


Page 7 of 55 FirstFirst 1 2 3 4 5 6 7 8 9 10 11 12 13 14 15 16 17 ... LastLast

Similar Threads

  1. The 4age powered Toyota 86
    By Matt in forum Info / Pics & Discussion
    Replies: 5
    Last Post: 18th December 2012, 11:36 AM
  2. 2AZ COP's - JJR recliner - rear shocks
    By biggo in forum Car Parts For Sale
    Replies: 0
    Last Post: 11th August 2012, 11:15 AM
  3. WTB: coilpacks + plugs off 1NZ, 2AZ or 1ZZ
    By Sam-Q in forum Cars or Parts Wanted
    Replies: 16
    Last Post: 15th February 2009, 08:09 PM
  4. 13b/13bT powered 86's?
    By jarryd in forum Technical - Questions
    Replies: 20
    Last Post: 30th November 2007, 01:01 AM
  5. Calling all CA18DET powered 86's
    By lowau in forum General Topics (No Technical Questions)
    Replies: 27
    Last Post: 21st August 2006, 11:06 AM

Posting Permissions

  • You may not post new threads
  • You may not post replies
  • You may not post attachments
  • You may not edit your posts
  •